Before taking measurements, ensure the paraglider is dry, as damp or wet material can affect results. Conduct measurements at a temperature of 20–25°C, as very low temperatures may alter the properties of the rubber bellows in the device. Place the porosimeter vertically on a stable surface.
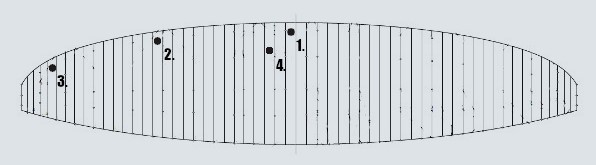
Select measurement locations that are undamaged and free from visible defects. Avoid measuring over stickers (e.g., logos or advertisements) or repaired areas. For best results, take multiple measurements (at least 3x) and calculate an average. If one result significantly deviates from the others, discard it and repeat the measurement nearby, as the material may have hidden mechanical damage that could skew results and misrepresent the paraglider’s condition. Perform tests 20–30 cm inward from the wing’s leading edge. Position the lid inside the paraglider, with the device remaining outside.
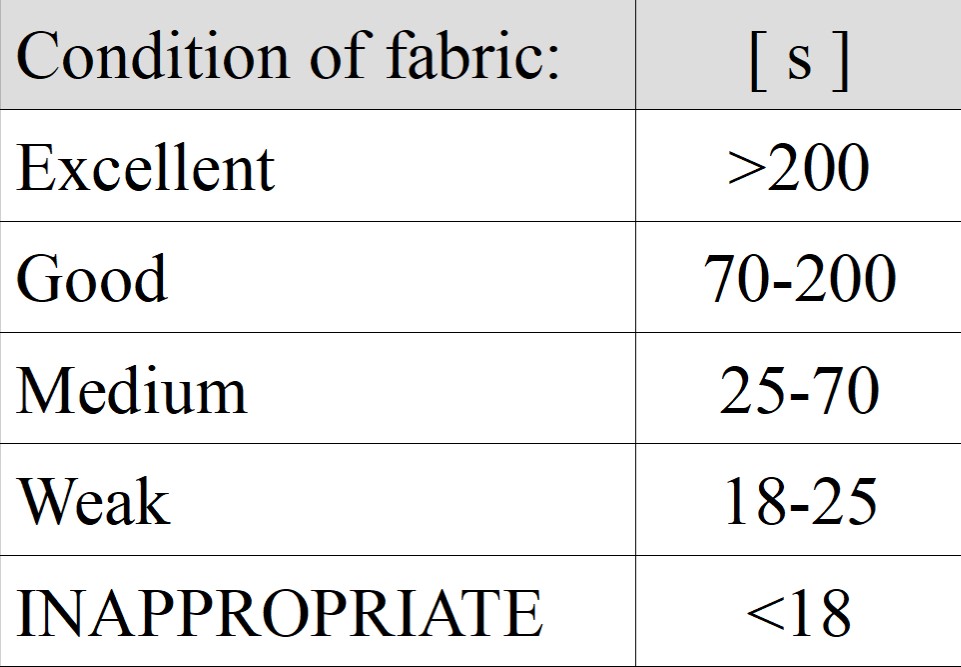
To process the measurements from the upper surface of the paraglider wing, calculate the average result in seconds [s]. Divide this average by 5400 to convert the result into units of liters per square meter per minute [l/m²/min]. Then, compare the converted result with the reference table to classify the paraglider into the appropriate porosity range.
Measurement:
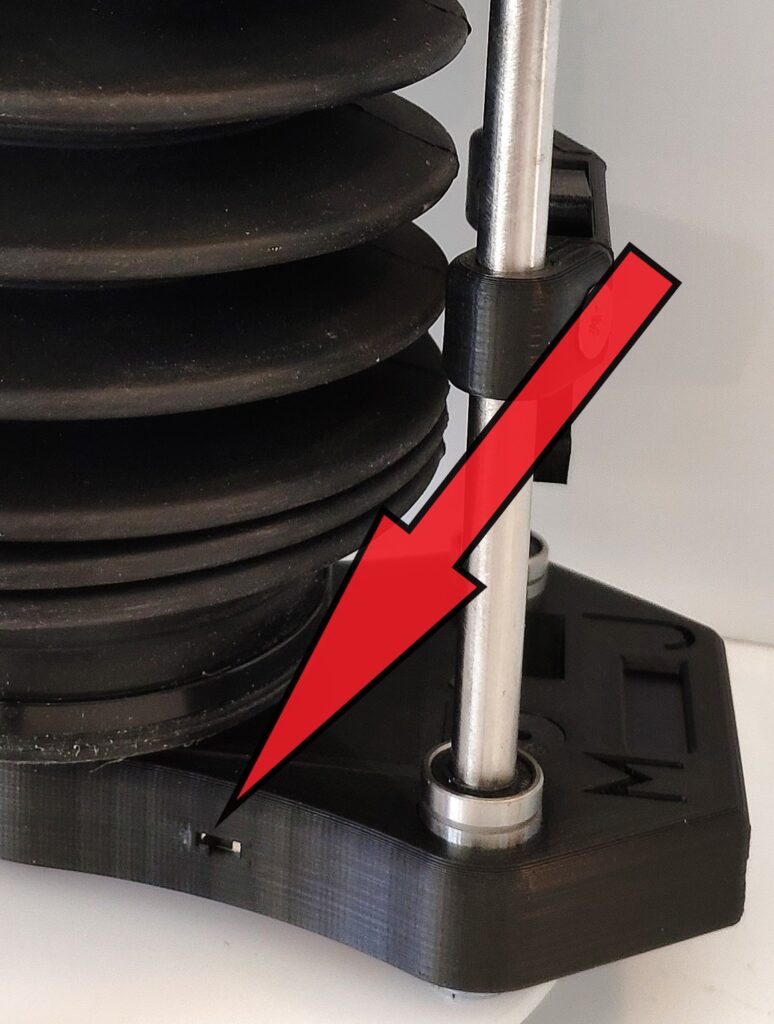
Turn on the device with the switch on the side of the moving element, „0.00” should appear on the display.
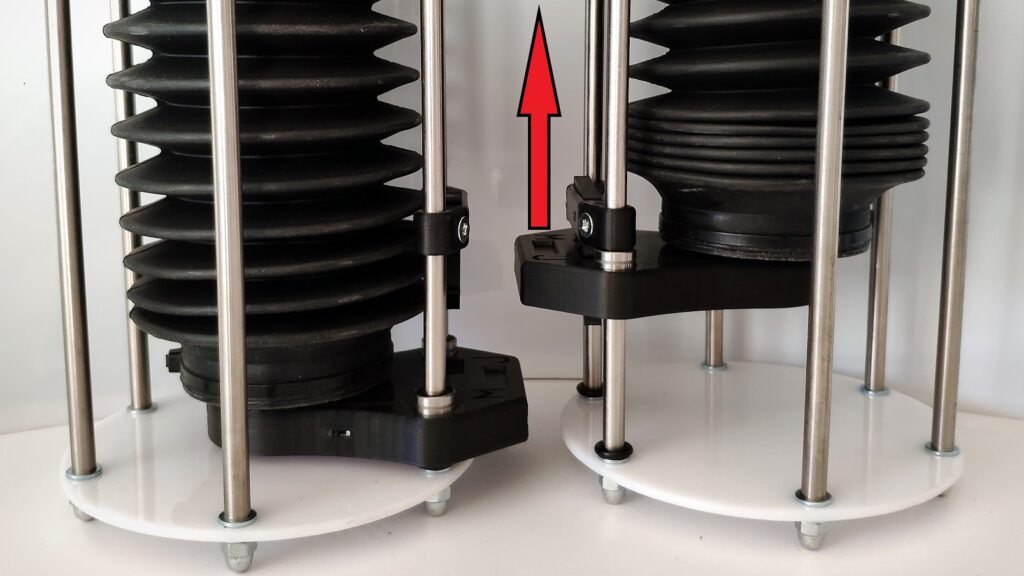
Pull up the elevator together with the rubber bellows until it locks in the upper position.
Remove the cover with magnets and stretch the tested material on the top surface so that it does not have any wrinkles. We put the lid back on.
We release the trigger of the elevator which falls to the lower position. Measurement begins, time is measured on the display, and the rubber bellows fills with air and goes to the lower position.
When the bellows touches the sensor, the time stops and the result on the display is the result of the measurement.
Take the lid off and remove the material to be tested. We turn off the device, or pull the lift again in order to take the next measurement (the clock will automatically reset with the next measurement).
Battery
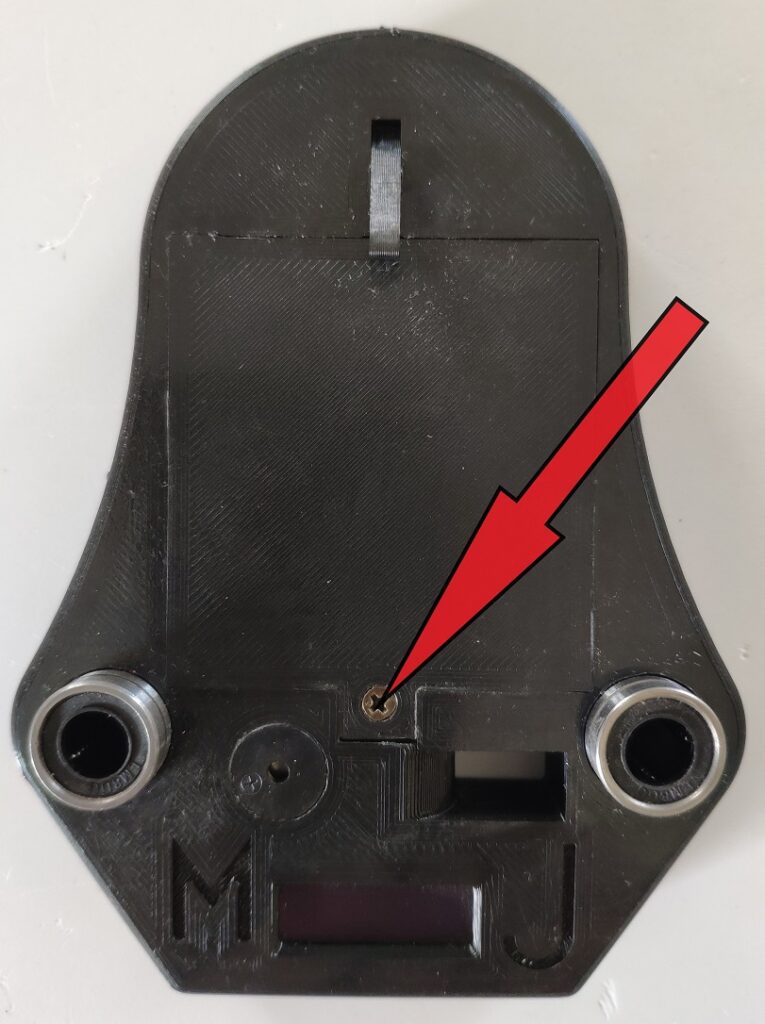
When the batteries are weak, the „battery low” message will appear on the display for a moment before the measurement (if you use 1.2v Ni-MH cells instead of 1.5v batteries, ignore this message) In order to replace the 4xAAA batteries, unscrew the screw and remove the plastic cover on top of the moving element.
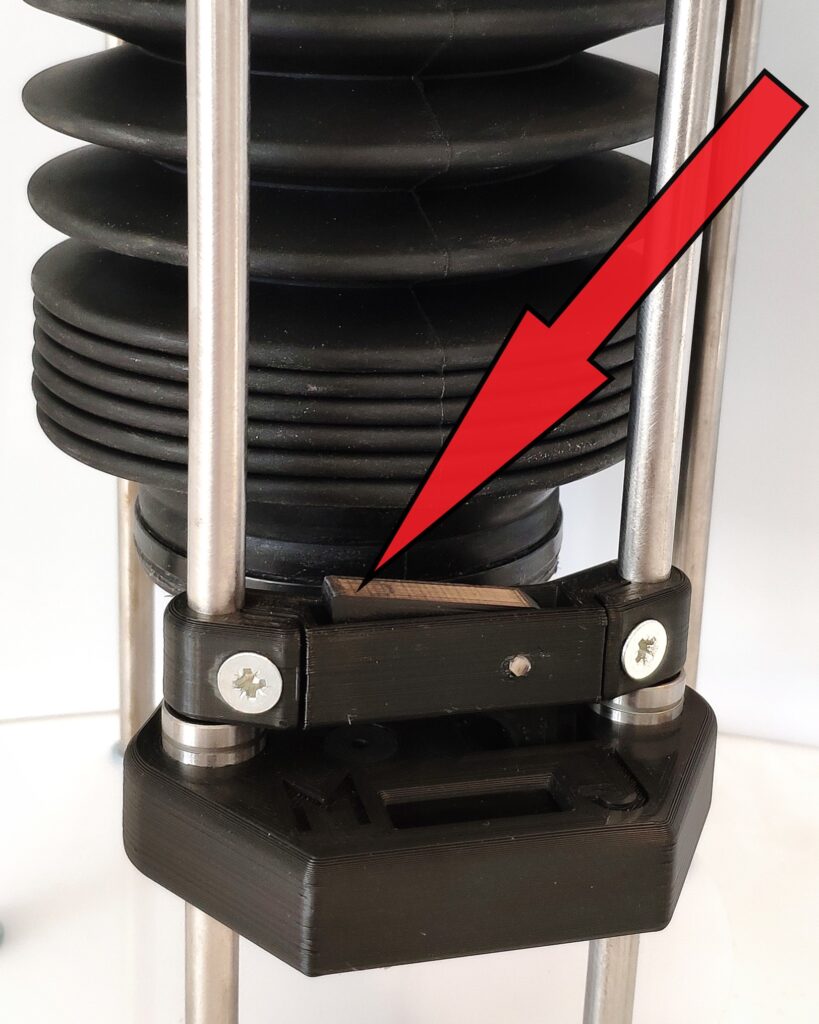
Tips – Do not expose the device to extreme temperatures (hot car on a sunny day). – It is best to store the device in the lower position, with a spacer between the lid and the seal. – Keep the top seal clean and try not to damage it. – Sometimes new fabrics or fabrics from Gelvenor give very high results (several thousand seconds), in this case you can stop the measurement and consider that the fabric has excellent porosity and do not wait until the end of the measurement. – Old types of porosimeters from other companies will give lower values for high measurements because they are not as tight as new solutions, and this effect increases with the length of the measurement. ( https://www.gleitschirmdrachenforum.de/forum/gleitschirm-und-drachen-forum/technik/21509-umrechnungsfaktor-jdc-kretschmer )